IMPORTANT DETAILS RELATED TO BRIDLES AND CONNECTIONS
You could say that of: “a little something unimportant”, but not, this is a very important detail. I’m talking about our Flysurfer kite foils

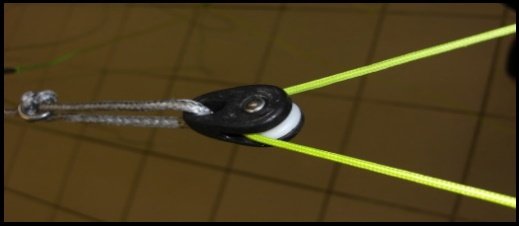
The yellow bridles, which pass inside the pulleys, with the use, they suffer a wear. Depending on how much you use your Flysurfer kite foil, evidently, but in any case, expect to change them every 3 months, sometimes, if after exhaustive use, perhaps one month only

As some of you already may know, that wear, which sometimes it is noticeable optically, provoques as well a shrinking of some centimeters
As this yellow bridles shrinks, this reduction in its length, propiciates two facts:
1-. We can adjust the trimmer, or possibility of realignment of the four knots on the Speed 3 model, or the three knots on the Speed 4 model, on the 8 and 10 meters sizes, which will make the kite fly again the most stable as possible and the kite will again offer us its best performance, or …
2.- We should change the yellow bridles if they really look in poor condition, before breakage or failure, which will send us direct to lack of control and possible accident
 .
.
How do we change the yellow bridles
And, back to the beginning, to proceed with the change of the yellow bridles you have to undo the connection between them and this is, basically, the subject of this post
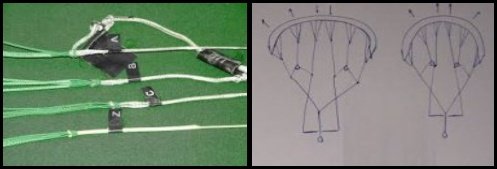
We must carefully see how they are connected, even, if possible, take a photo with your smartphone of camera because … what you really don’t want, is to connect them in the fake illusion that you have done it well
More than anything, because if we do them wrongly, those connections will slide off, they will simply fail, and then the big fright it is just around the corner
And regarding the trimmer, a couple more details to consider:
Once we have set the precise distance between knots we have to make sure to pull strong from both sides of the grey bridle again, to confirm that the distance between them it is the desired
In case of doubt, prior to this change, take as reference the same connection in the other side of the kite, which we have not yet manipulate. Check well the pics over this lines and get familiar with the proper way to connect them

Also, keep in mind that the pulleys suffer wear, which will cause one of its sides, usually the inner side, to get wear more than the other side of the pulley and that could cause the bridle to jam and with it collapse of the kite
Or, even worse, it could cause the malfunction of the entire system on the side of the failed pulley, causing the kite to loop around, making you lose control
In older models of the Flysurfer kite foils you will have to deal with the old metal connections, which can also be a bit complicated if you have never done it before
Do you want to learn Kitesurf in Vietnam?
Book your course at the best price
To contact the school click here

